If you use mailmerge in Word, often the source of contact details comes from Excel. And there are times when you inherit contact details from another project or colleague, and the names may not be separated.
This can be a heart-sink moment as you need to separate each name individually. Argh…this is going to take hours….or in the style of a panto…”oh no it doesn’t!”
How to separate names in Excel – Text to Columns
This is when Excel can save you hours, and possibly even days…you can separate names using Text To Columns.
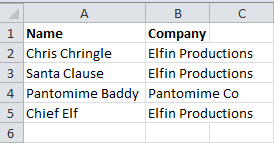
Here is a seasonal list of names I need to separate

In Excel then you can separate the names using the Text to Columns feature on the Data tab.
1.First insert 2 blank columns to the right of your Names column.

2. Highlight the names in column A and then go to the Data tab, and select Text to Columns.


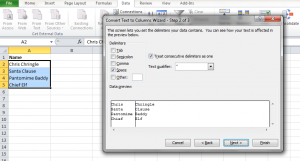
In the dialogue box, select Delimited.
3. Click on space as the first names and surnames are separated by a space.
4. Choose a destination cell at the top of the first inserted column. In our example, we want to use the adjacent cells in column B and C.

5. Press ok. The data will then be broken up where ever a space occurs.

This technique is included in our Excel training courses and can help you with your Word and Excel work.