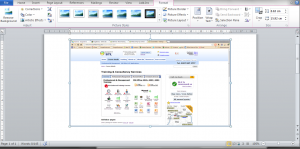
KeyTip? 5 minutes ago I had no idea what that was. So much so, that I thought, well, it can’t be that important if I haven’t heard of them before…such a little thing, but oh-so-useful.
What is a KeyTip? Well, it’s another name for a keyboard shortcut using your Ribbon.
In Word 2010, I can access KeyTips by pressing the Alt key. Then I can use my keyboard to select the key letter of the tab I want to use. (and it gives my hand a break from using the mouse).
If I want to change a whole paragraph to bold using KeyTips, I select the text that I want to edit.
I press Alt, which brings up the keys I can use to complete my task. I press H on my keyboard to get to the Home menu, then KeyTips appear in the home tab…so I can press 1.
To summarise in actions…I’ve selected text, pressed Alt, then H then 1.
I’ve learned when changing from Word 2003 to 2010, a few moments exploring can result in getting a useful tool that will make my work easier. Sometimes I even experience a little moment of IT pride ” oh, yeah, I use that all the time, don’t you?”
KeyTips are part of Introduction level Microsoft Word Training.

