Save time by avoiding repetition and errors
Excel is great for lists; sales figures, staff rota’s, stock control, to name a few. But an easy trap to fall into is repetitive error prone data-entry that leads to inaccurate business reporting and lost time in troubleshooting.
If you create a drop-down list in Excel, you can avoid all of this. Imagine the time saved short and long term especially if multiple people are using the same spreadsheet.
How to create a drop-down list in Excel
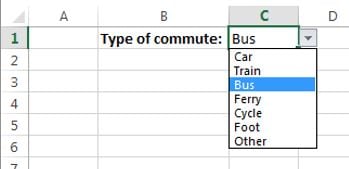
Step 1 Assign the values for your drop-down list. In a new worksheet, just start your list and order it if you wish (better now than later!)
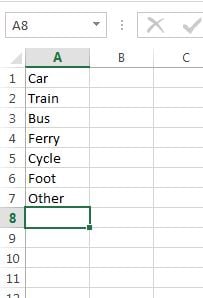
Step 2 Now select the data and right click, select Define Name.
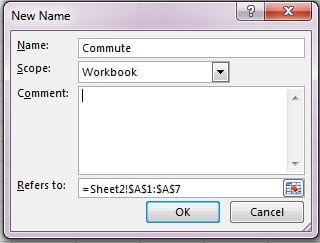
Step 3 In the New Name dialogue box you need to give your data name (this is a named range), making sure not to have any spaces in the name. Example, Commute
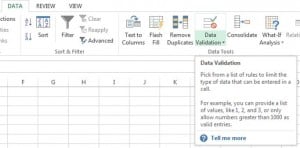
Step 4 Now go to the worksheet where you wish create a drop-down list in Excel, and click a cell. Go to the Data tab and select Data Validation
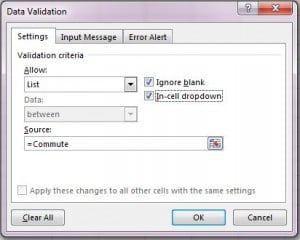
Step 5 In Settings tab we need to do the following:
Select List from the Allow box.
Ensure In-cell dropdown is ticked. If you are okay for blank entries to be made just leave the Ignore blank ticked.
In the Source box we need to type in the name of our list making sure to start with an =. In this case, =Commute
Now click OK, your drop-down list is ready to go. You may have noticed two other tabs within the Data Validation box. The Input Message and Error Alert give you even more options to control how data is entered and also what messages appear to users when they have not entered data correctly.
To create a drop-down list in Excel is pretty straight forward giving us some major advantages in saving time from data entry as well as data error. Data validation in it’s own right can really help businesses adopt more consistent and efficient use of Excel spreadsheets.
More related information:
Excel data validation in business
A real world example of assigning values to a drop-down list in Excel
A further look at Input Message & Error Alert
