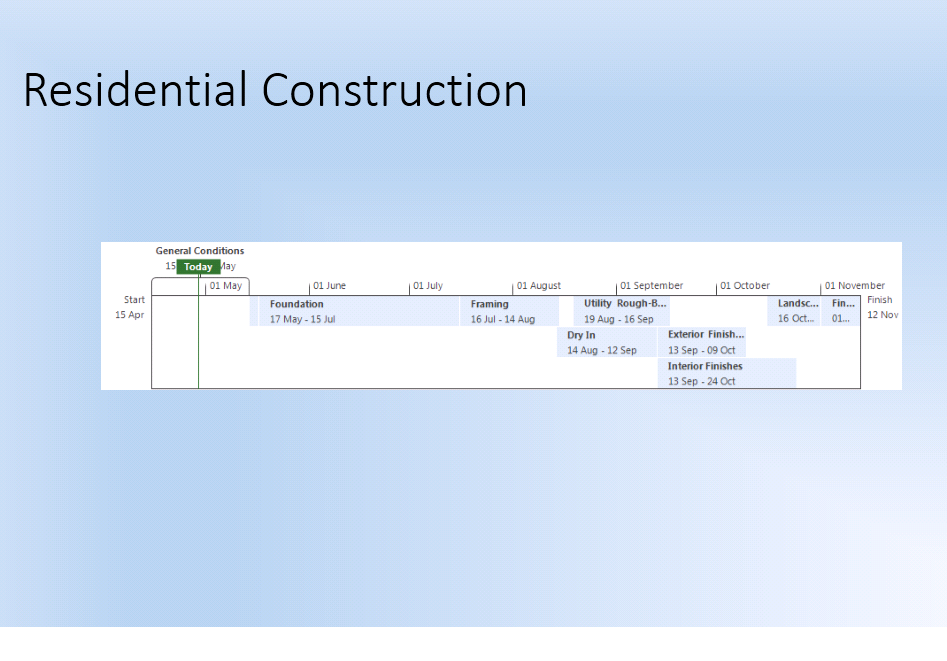
The Timeline feature was first introduced to MS Project users in 2010. It helps to display a visual summary of a project. This post will detail the many functions of the Timeline feature and which benefits it can offer in addition to the normal Gantt view.
In its simplest form, the Timeline can be used to show the start and finish times of your project, allowing you to summarise tasks in line with the current date. You can also use the Timeline to pan through your project as a navigation pane.
Tasks can easily be added / removed from the Timeline or displayed as a callout above the navigation bar. If it’s taking up too much room on the screen, the Timeline can be removed, displayed simply as bars without any detail text or as a single bar.
Getting Started: Displaying the Timeline
If it’s not already displayed: Select the View tab > Tick Timeline
Adding tasks to the Timeline
Making changes to the format of the Timeline is easy, simply click anywhere inside the Timeline to see the contextual Timeline Tools > Format ribbon.
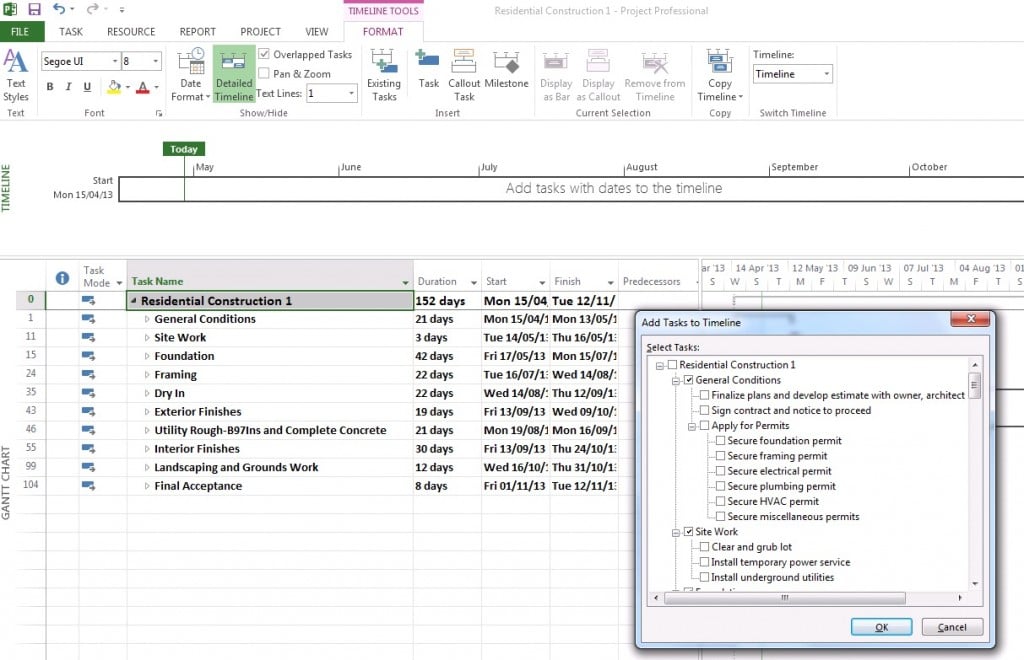
To add tasks to the Timeline, click inside the Timeline then select Existing tasks.
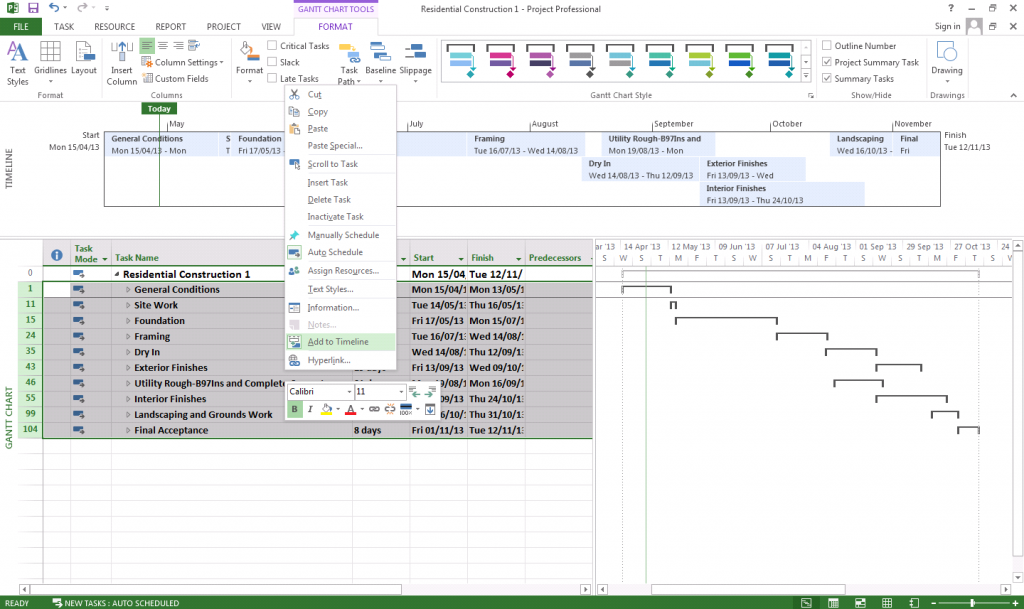
Alternatively, right click a task in your project and choose Add to Timeline.
Adding each individual task can cause the Timeline to become cluttered. With this in mind, It makes sense not to add too many tasks. If you wish to add only the top level tasks select:
View > Outline > Level 1 > Highlight all the level 1 tasks > Right click and choose Add to Timeline.
Pan & Zoom
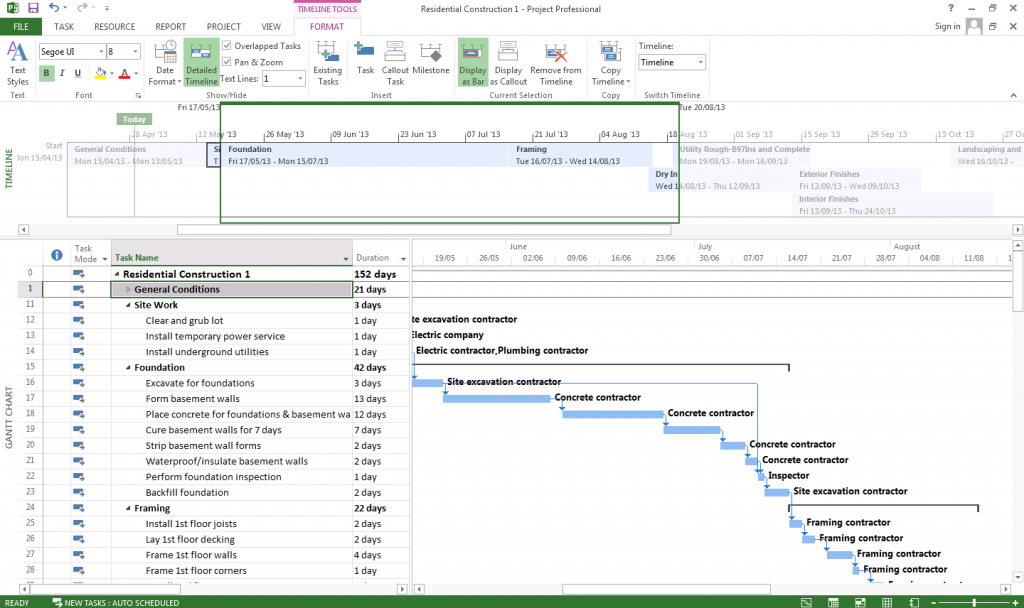
When the option Pan & Zoom is selected you can use the Timeline as a navigator for your project.
To pan to a different part of the timescale, drag the top edge of the square frame displayed in the Timeline to the left or right.
To zoom to a larger or smaller frame, click and drag the sides of the frame.
Overlapping Tasks
Turning off the option Overlapping tasks displays all the tasks in one single line.
Detailed Timeline
Turning off Detailed Timeline displays the Timeline as a series of bars without showing any task text.
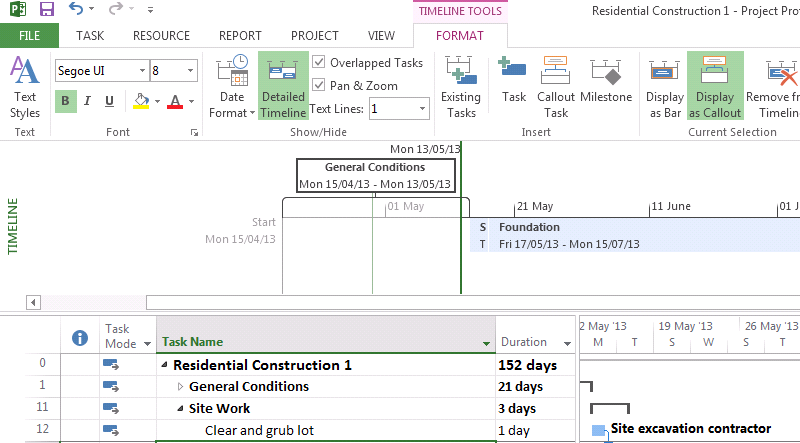
Display as Callout
Rather than being displayed as bars, tasks can be displayed as Callouts above the Timescale. This can be used to highlight a group of tasks. In this example the General Conditions phase is passed and displayed as a Callout.
Date Format
The Date Format option within Timeline Tools allows the format of the Timescale dates to be changed (for example whether to include the year). The Default option returns the Timescale to standard format. The Show/Hide section at the bottom allows the Timescale, task dates and the current date to be hidden from view too.
Copy Timeline
Updating clients and colleagues with the progress of a project is an imperative aspect of the communication process. This option allows a Timeline to be copied into an email message or into a PowerPoint presentation slide for quick and easy sharing.
Switching Views
One of the benefits of The Timeline is that it remains on view when switching to other Project views such as Resource Sheet or Resource Usage views. This can help with managing and updating a project by reducing the need to keep switching views. If it is not useful in a particular view then simply turn it off from the View tab.
In summary, the Timeline is a useful way of viewing and staying in control of top level tasks and communicating information to others. It also has the potential to help navigate and manage large projects.
Find out more great advice for best practice with MS Project, browse Best STL course on Microsoft Project training, London and UK wide.
Back to the Future image courtesy of Giant Bomb
